![]() RaspArch Build 221127 especially for the new Raspberry Pi 4 released in May 2020
RaspArch Build 221127 especially for the new Raspberry Pi 4 released in May 2020
This version (221127) is especially made for the “new” Raspberry Pi 4, but it can of course also be used on a Raspberry Pi 3 Model B+, Raspberry Pi 3 Model B and Raspberry Pi 2 Model B.
NEWS 221202
I have uploaded a new version of RaspArch after I’ve discovered a better way to configure the system. I.e. I’ve replaced /boot/config.txt with this file. The new configuration makes the system automatically choose the best possible resolution for your monitor. Watch this screenshot when I’m using a 3440×1440 (Ultrawide) monitor.
NOTE: If you already have installed RaspArch Build 221127 you don’t have to reinstall. Just replace /boot/config.txt with the one I’ve provided – see above. Then reboot. You will probably notice a big difference.
RaspArch is a “remaster” of Arch Linux ARM. The original compressed system is of about 230 MB. After I have added the LXDE Desktop environment, PulseAudio, Firefox, Yay, Gimp and NetworkManager the system has increased a lot. RaspArch is a “ready-to-go” ARM system. It must be installed on a Raspberry Pi 4, Raspberry Pi 3 Model B+, Raspberry Pi 3 Model B or Raspberry Pi 2 Model B computer.
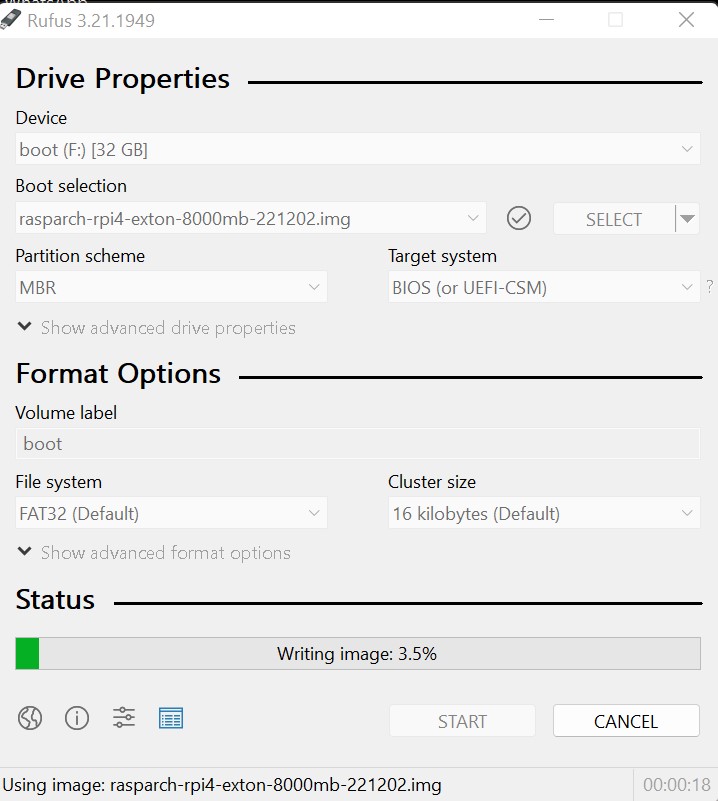
Most important change in version 221127: Use Rufus 3.20 to install RaspArch to the SD card
This version can be installed in Windows using Rufus 3.20, Win32 Disk Imager or Etcher. Previous versions could only be installed when running a Linux system. Using Rufus or Win32 Disk Imager has one disadvantage though. Only about 2GB can be used as data storage no matter which card you use. The system is of 6GB and the system partition of 8GB. If you use a card of 128GB about 122GB will be unused. A few month ago a member on this site wrote about how to get rid of the 6GB limit after Rufus, Win32 Disk Imager or Etcher has been used:
– write the image with Rufus 3.21
– start up Ubuntu or another Linux system – you can also use a Linux Live CD/USB stick
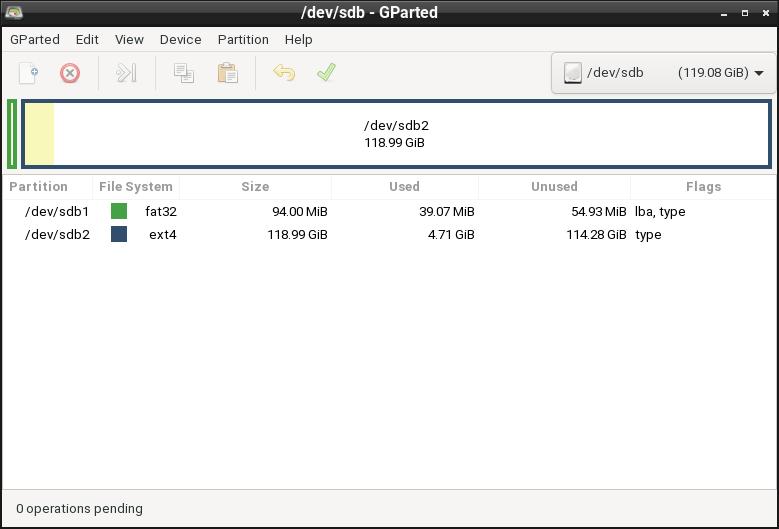
– start GParted – screenshot before resizing
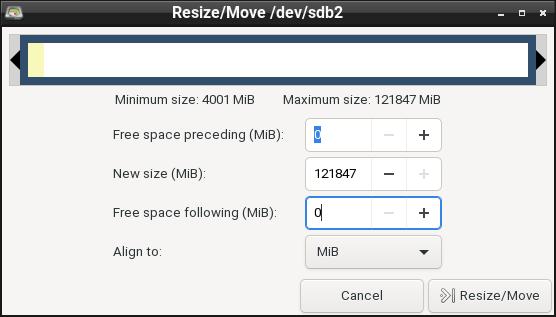
– screenshot during resizing
– resize the DATA (/dev/sdb2 ext4) partition – screenshot after resizing
– done!
This screenshot shows that RaspArch now has about 113GB free storage. NOTE (very important): You should do the resizing directly after you have transferred the image to your SD card. That is if you don’t think that 2GB (8GB – 6GB) is enough for new installations etc.
Writing the image using Rufus 3.21. See the screenshot below.
UPGRADE RaspArch
If you have downloaded and installed one of my previous versions of RaspArch before you can still use the Micro SD Card with RaspArch on the new Raspberry Pi 4 after a full upgrade of the system. Commands: pacman -Sy followed by pacman -Syu. Most important the old kernel will automatically be replaced by kernel 5.15.79-2-rpi-ARCH.
NOTE: After such an upgrade LightDM Display Manager will be unusable (for some unknown reason). Therefore you should uninstall LightDM and replace it with SLiM.
Commands: sudo pacman -R lightdm followed by sudo pacman -S slim.
NEWS in RaspArch Build 221127
A new kernel – 5.15.79-2-rpi-ARCH. All included packages have been updated to the latest version as of 221202. I’ve also replaced Yaourt with Yay – Yet Another Yogurt – An AUR Helper Written in Go. I came to know that Yaourt is dead. I.e. Yaourt is not being developed anymore. I have also installed PulseAudio. I’ve replaced the LightDM Display Manager with SLiM. Finally the sound works very well in RaspArch. Nice if you like YouTube. I’ve also replaced Wicd with NetworkManager. It works better. NOTE: To be able to install Yay I had to install a lot of development tools.
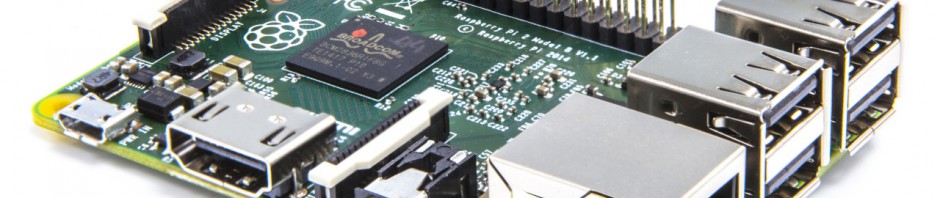
What is Raspberry Pi?
The Raspberry Pi is a low cost, credit-card sized computer that plugs into a computer monitor or TV, and uses a standard keyboard and mouse. It is a capable little device that enables people of all ages to explore computing, and to learn how to program in languages like Scratch and Python. It’s capable of doing everything you’d expect a desktop computer to do, from browsing the internet and playing high-definition video, to making spreadsheets, word-processing, and playing games.
Read more about Raspberry Pi…
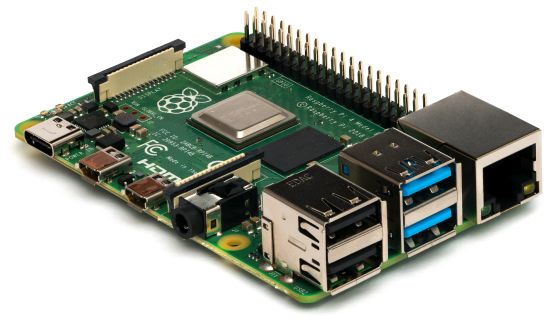
The Raspberry Pi 4 made in May 2020. It has:
– 2x USB 3.0 ports
– 2x USB 2.0 ports
– Gigabit Ethernet
– Power-over-Ethernet (this will require a PoE HAT)
– 40-pin GPIO header
– 2× micro-HDMI ports (up to 4Kp60 supported)
– H.265 (4Kp60 decode)
– H.264 (1080p60 decode, 1080p30 encode)
– OpenGL ES, 3.0 graphics
– DSI display port
– CSI camera port
– Combined 3.5mm analog audio and composite video jack
– Micro-SD card slot
– USB-C power
– 2GB, 4GB or 8GB RAM
Raspberry Pi 4: How much better is it than the Raspberry Pi 3 Model B+?
Raspberry Pi 3 Model 3 B: How much better is it than the Raspberry Pi 2? Raspberry Pi 3 is performing 10 times faster than that of the Pi 1 and around 50 percent better than that of the Pi 2 according to testers.
Raspberry Pi 3 Model 3 B+: How much better is it than the Raspberry Pi 3 Model B? The tiny computer is supposed to be faster and better in every way, including upgraded processor speed, wireless internet, and Ethernet connections.
More about RaspArch
When you have installed RaspArch to your Micro SD Card you can use the system like any other Arch Linux system. I.e. install new programs etc. Arch motto is KISS (Keep It Simple Stupid). RaspArch uses kernel 5.15.79-2-rpi-ARCH and the LXDE Desktop environment.
Login and passwords
After the boot process is ready you will end up at SliM’s login page – see the screenshot below. Log in as the ordinary user archpi with password raspberry or as root with password root. While logged in as archpi you can use Sudo to become root. Example commands: sudo su and sudo pcmanfm.

Program Management in Arch Linux
Arch Linux uses a proprietary system called Pacman. It is similar to that found in CRUX Linux. Read about Pacman.
You can also read all the documentation on Arch Linux. Seven commands are basically the only ones you need to use:
1) pacman -Sy (update the packages database)
2) pacman-key –refresh-keys
3) pacman -Sy archlinux-keyring
4) pacman -Syu (upgrading the whole system)
5) pacman -S MyUsefulProgram (the package installation command)
6) pacman -R UnnecessaryProgram (uninstall a package).
7) pacman -S –overwrite MyUsefulProgram (in case you get an error about “conflicting packages”)
8) pacman -Scc (clean pacman cache)
Very simple!
Note1: You can also use Yay – see below.
Using Yay – Yet Another Yogurt – An AUR Helper
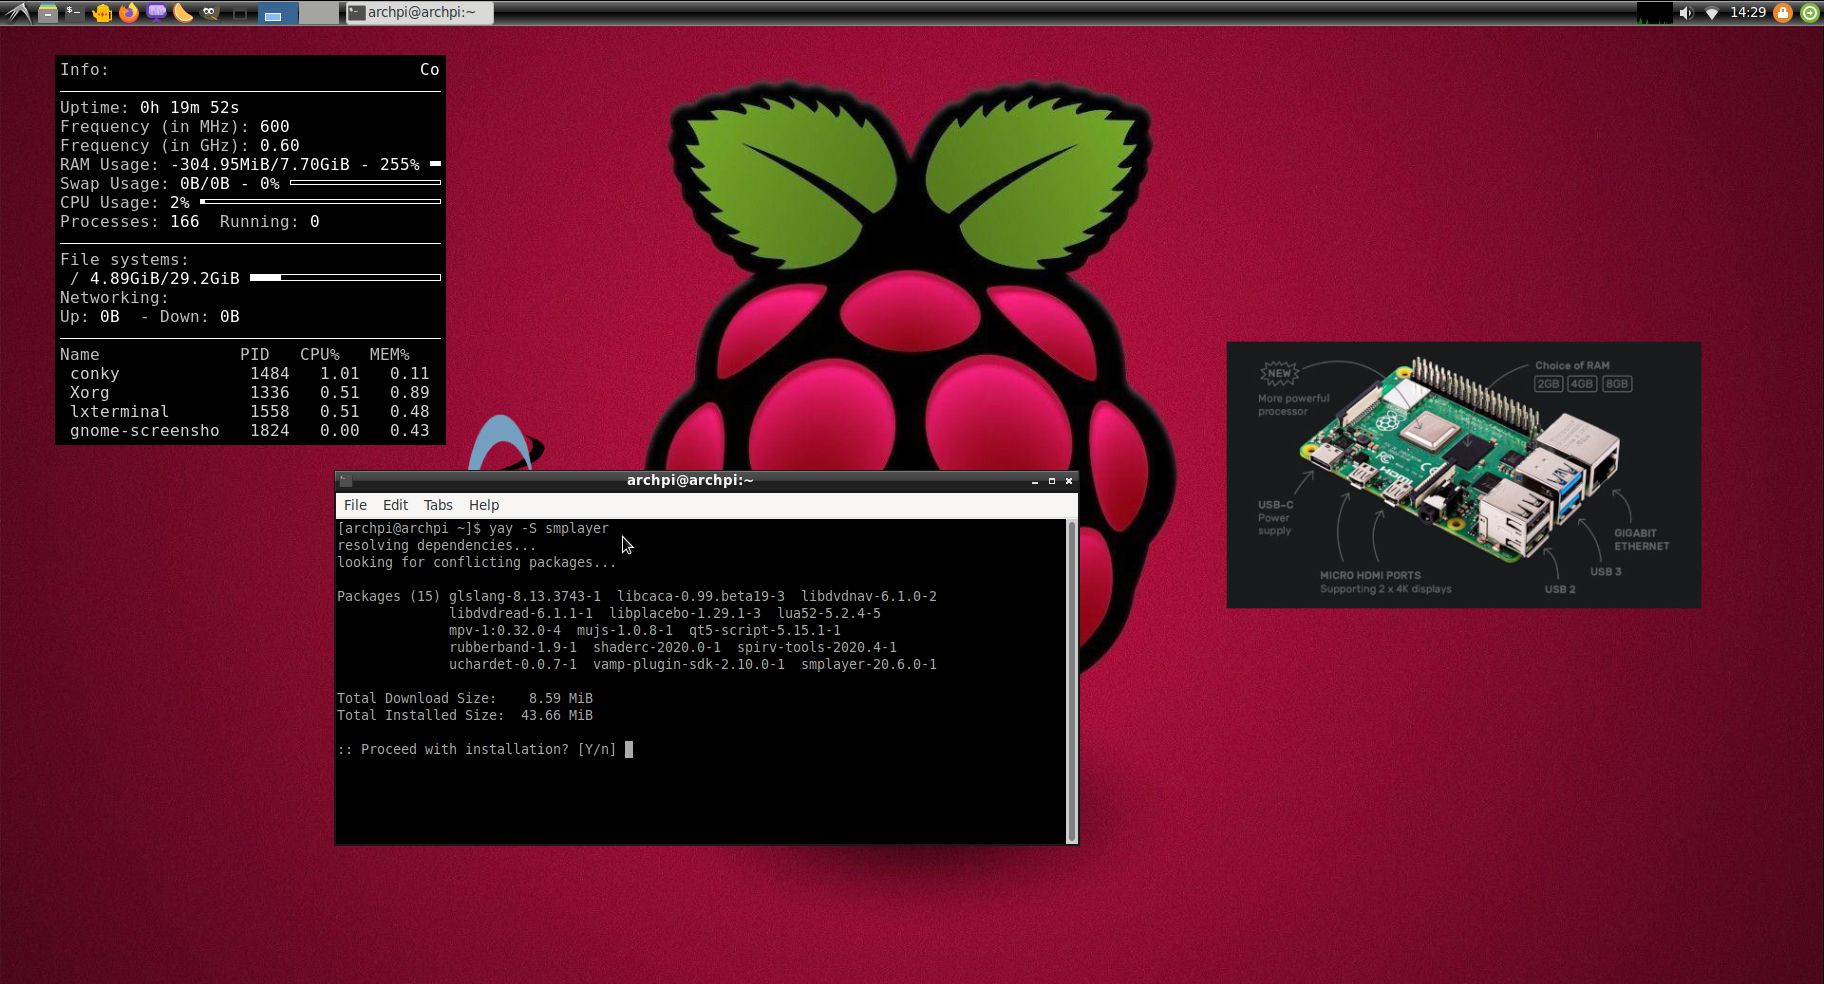
If you want to install certain special packages you can/must install Yay. Study this tutorial about how to install and use Yay – Yet Another Yogurt – An AUR Helper Written in Go. Note: Yay is pre-installed in RaspArch Build 220216. If you want to install new packages through Yay you’ll have to run the command su archpi before yay -S MyNeededProgram. If you’re not logged in as the ordinary user archpi. (You can’t run Yay as root). Watch a screenshot when I’m installing SMPlayer using Yay.
How do I install RaspArch?
Use Rufus 3.20, Win32 Disk Imager or Etcher – see above. Unzip the downloaded file rasparch-rpi4-exton-2630mb-221127.zip. You will get the image file rasparch-rpi4-exton-8000mb-221127.img which is the file you shall install to your micro SD card.
Different Micro SD Cards
For best performance you should use SD Cards of good quality. I can recommend Samsung MicroSD Pro Plus 32GB Class 10. Write speed up to 95 MB/s. Also SanDisk MicroSD Ultra 128GB Class 10. Write speed up to 100 MB/s. NOTE: If you can’t run RaspArch at all you should try with a new “better” card.
Wireless connections
Just use NetworkManager, add your password and connect.
Installing/using Samba
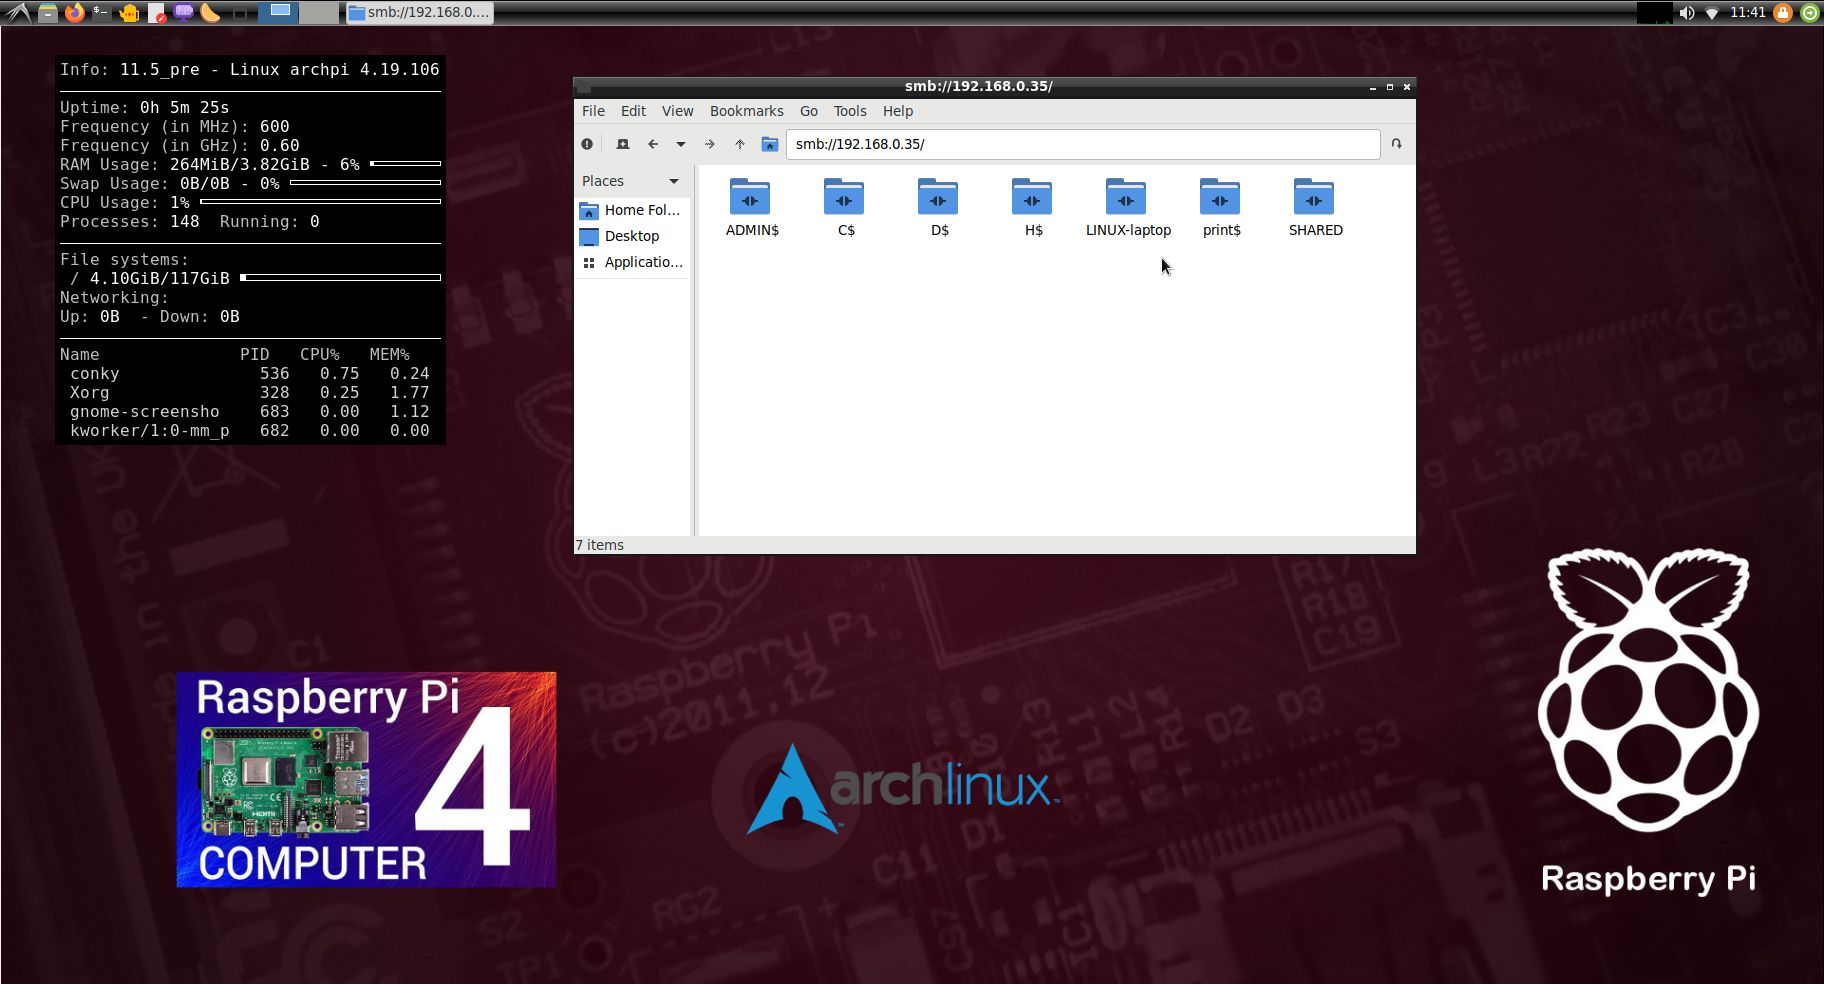
A way to reach your Windows computers in your home network is to install Samba. Command: pacman -S samba gvfs gvfs-smb sshfs
Then start Samba with the command systemctl start smb.service nmb.service
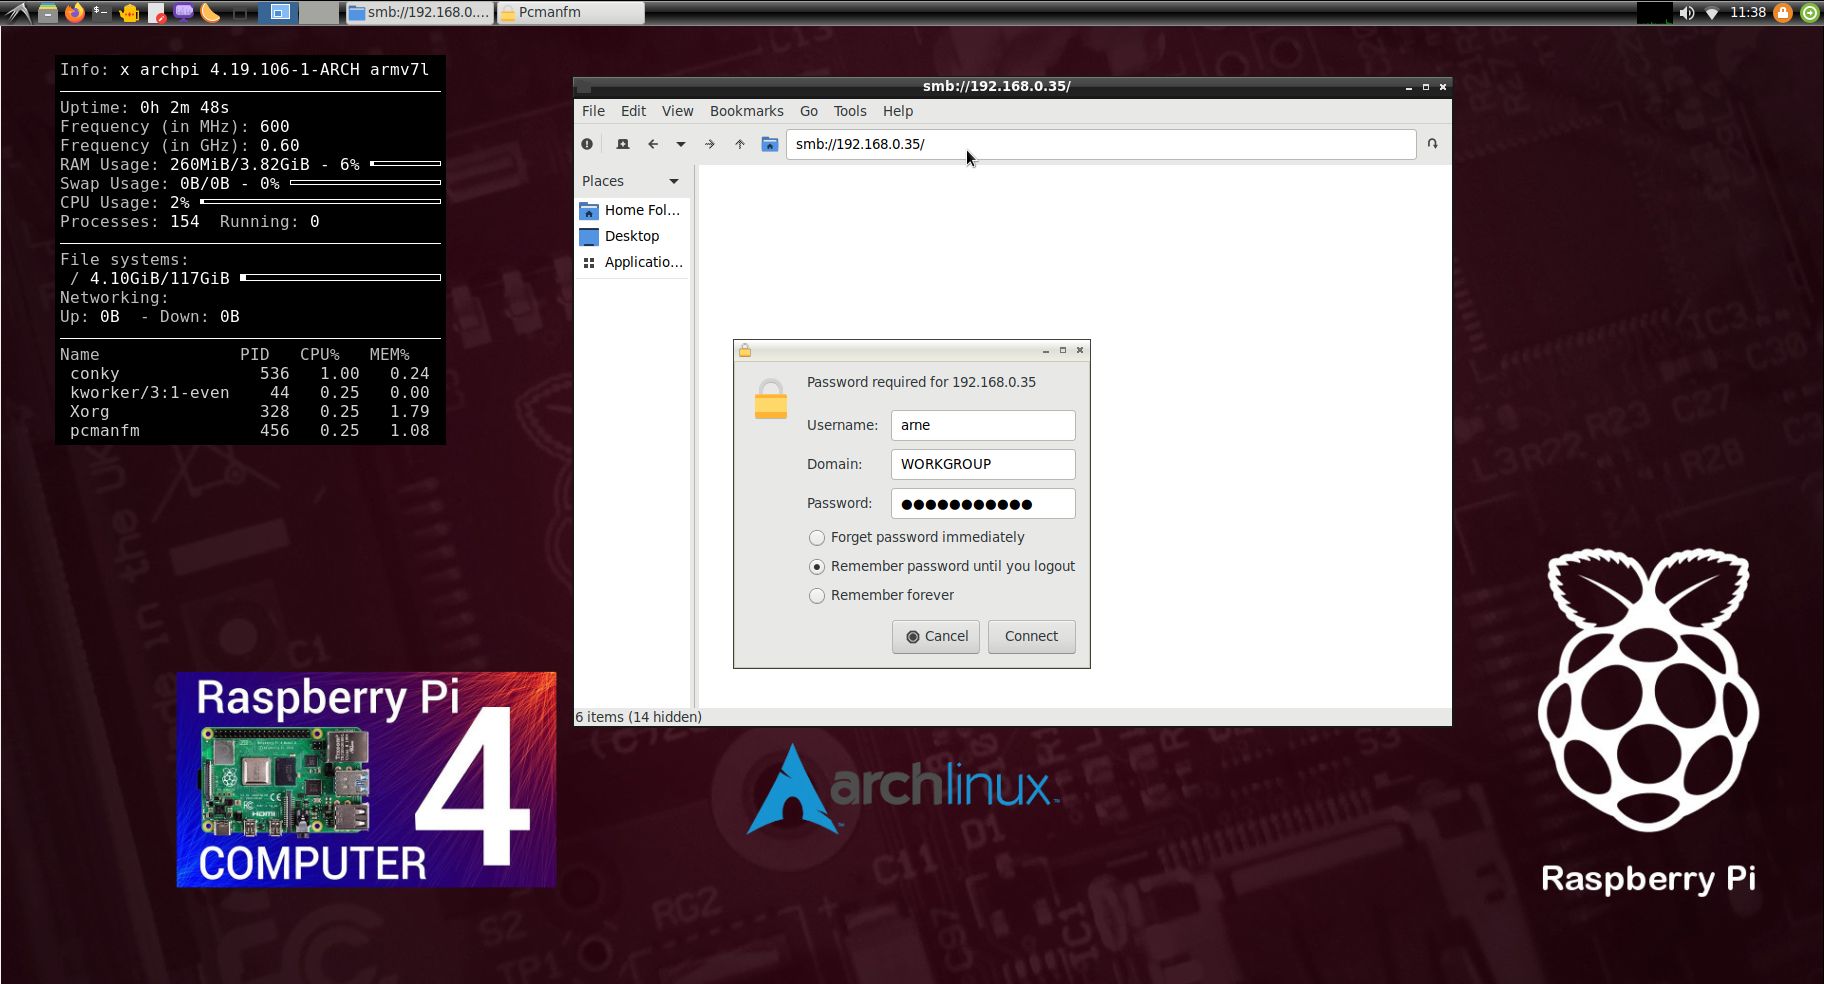
After that you can connect to your Windows computers via PCManFM – watch this screenshot. (My Raspberry Pi 4 running RaspArch is connected to one of my computers in my home network). NOTE: Samba is already installed and configured in RaspArch Build 221127. Just run the command sudo systemctl enable smb.service nmb.service. You may have to reboot your Rpi before you can use Samba.
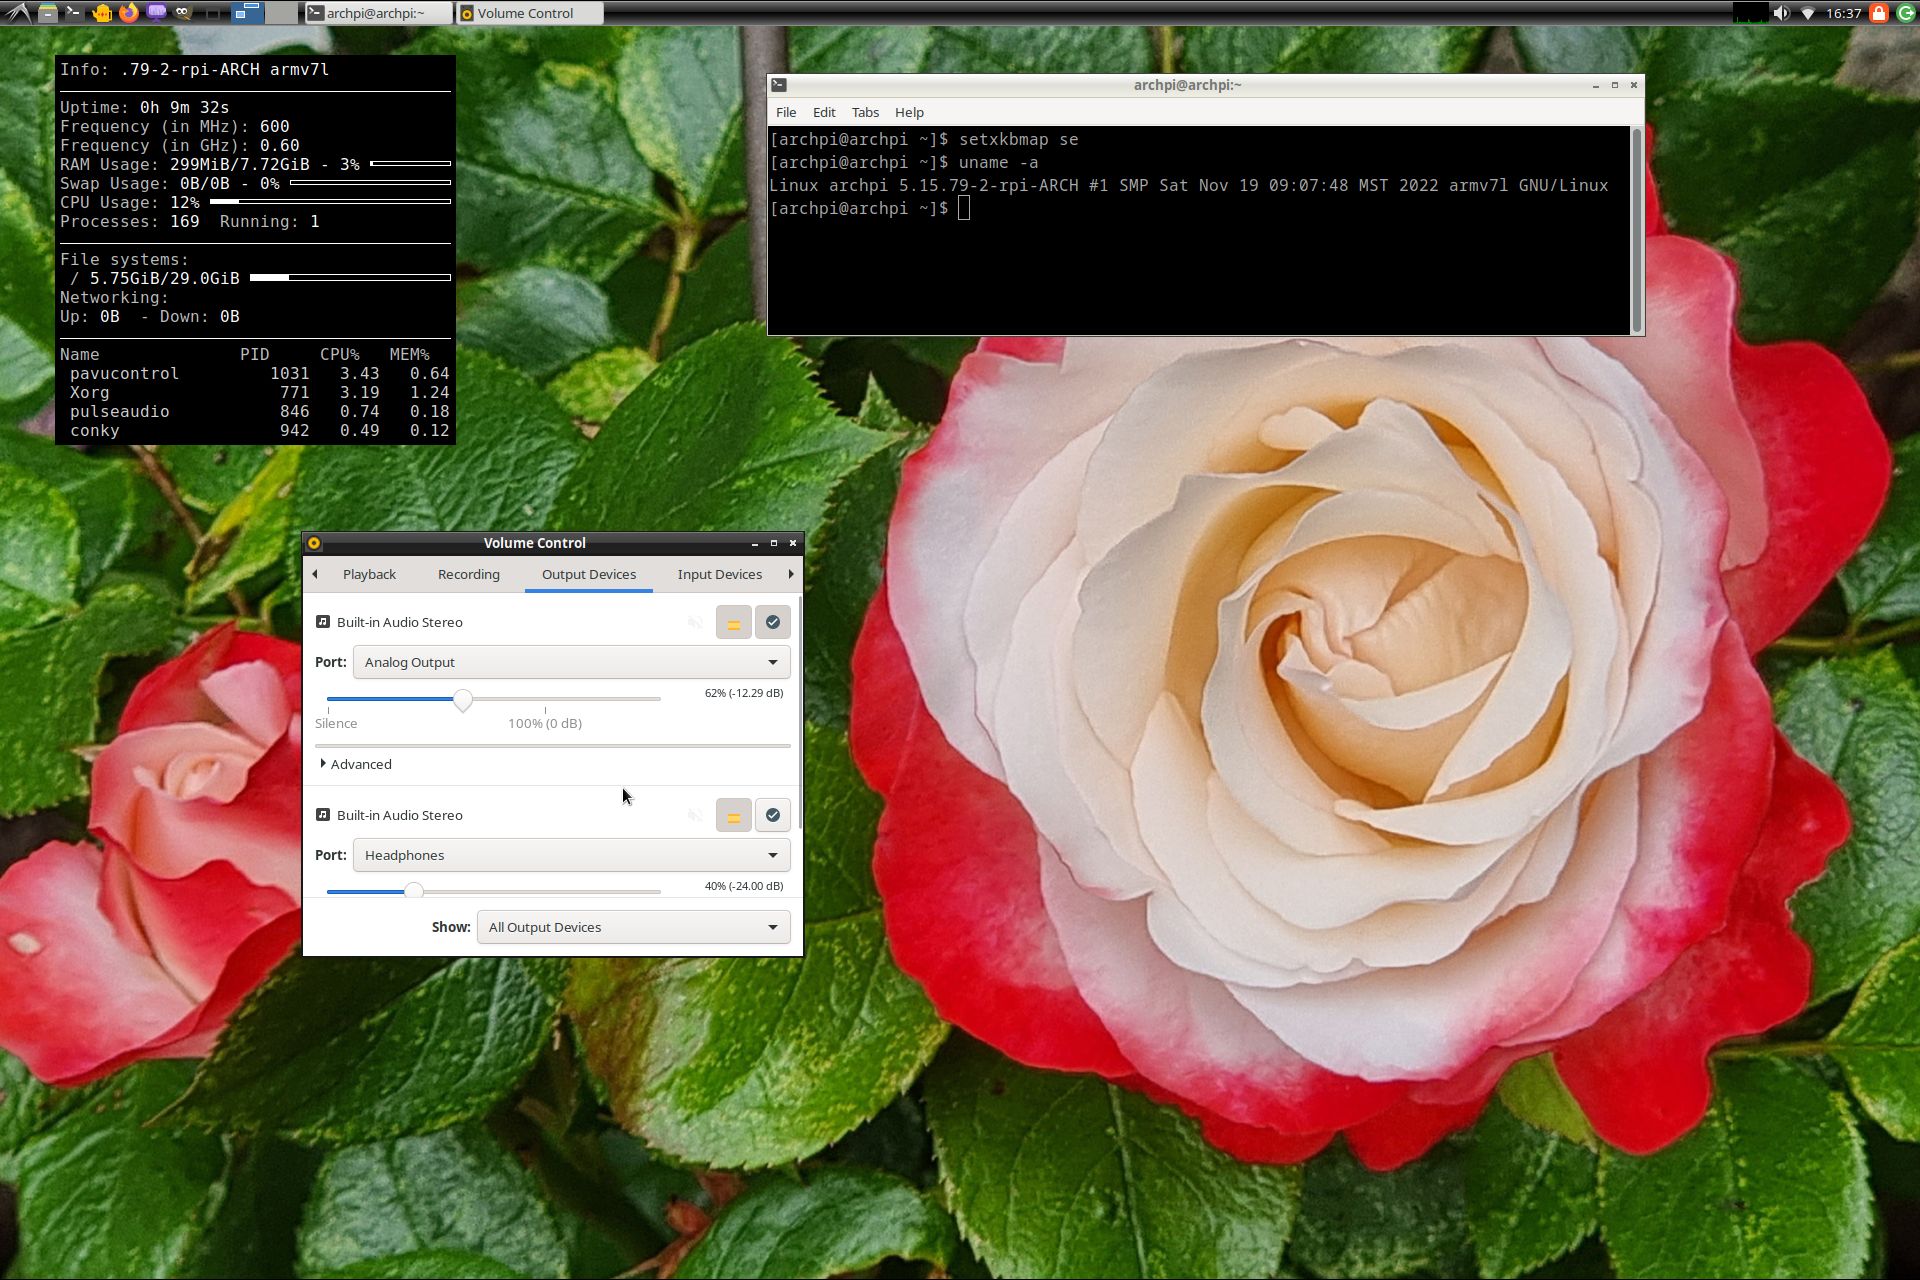
Sound in RaspArch
In Build 221127 I’ve installed alsa-utils, PulseAudio and Pavucontrol. The sound works alright now. From Arch Linux for Raspberry Pi Wiki I learned this. If you want/need sound in RaspArch you should follow the instruction below. Run the following command: amixer cset numid=3 X
Where X corresponds to:
0 for Auto
1 for Analog out
2 for HDMIAdd the following lines to /boot/config.txt
dtparam=audio=on
and
audio_pwm_mode=2 (if you use the 3.5mm analogue output)
WHO should run Arch Linux/RaspArch?
My answer: The system fits the “advanced” Linux user/enthusiast, who would be willing to run an occasional command from time to time.
BENEFITS of Arch Linux/RaspArch
“Cutting Edge”-software and speed. A member on this site recently wrote this about RaspArch: I’ve used Slackware, Debian, Gentoo, Ubuntu & Arch. I prefer Arch. Ubuntu is easier to install, Arch is easier to keep up to date. You do not go through big, painful, changes every year instead you just update, once in a while, make changes if instructed. Arch has most of the benefits of Gentoo without the pain of recompiling _everything_. When you do need to build a package in Arch its painless especially if you use one of the tools that support AUR (I like Yay). Arch avoids the politics of Debian and Ubuntu and delivers a great Linux distribution. RaspArch now brings these advantages to the Pi 2.
Study all installed packages in RaspArch
SCREENSHOTS
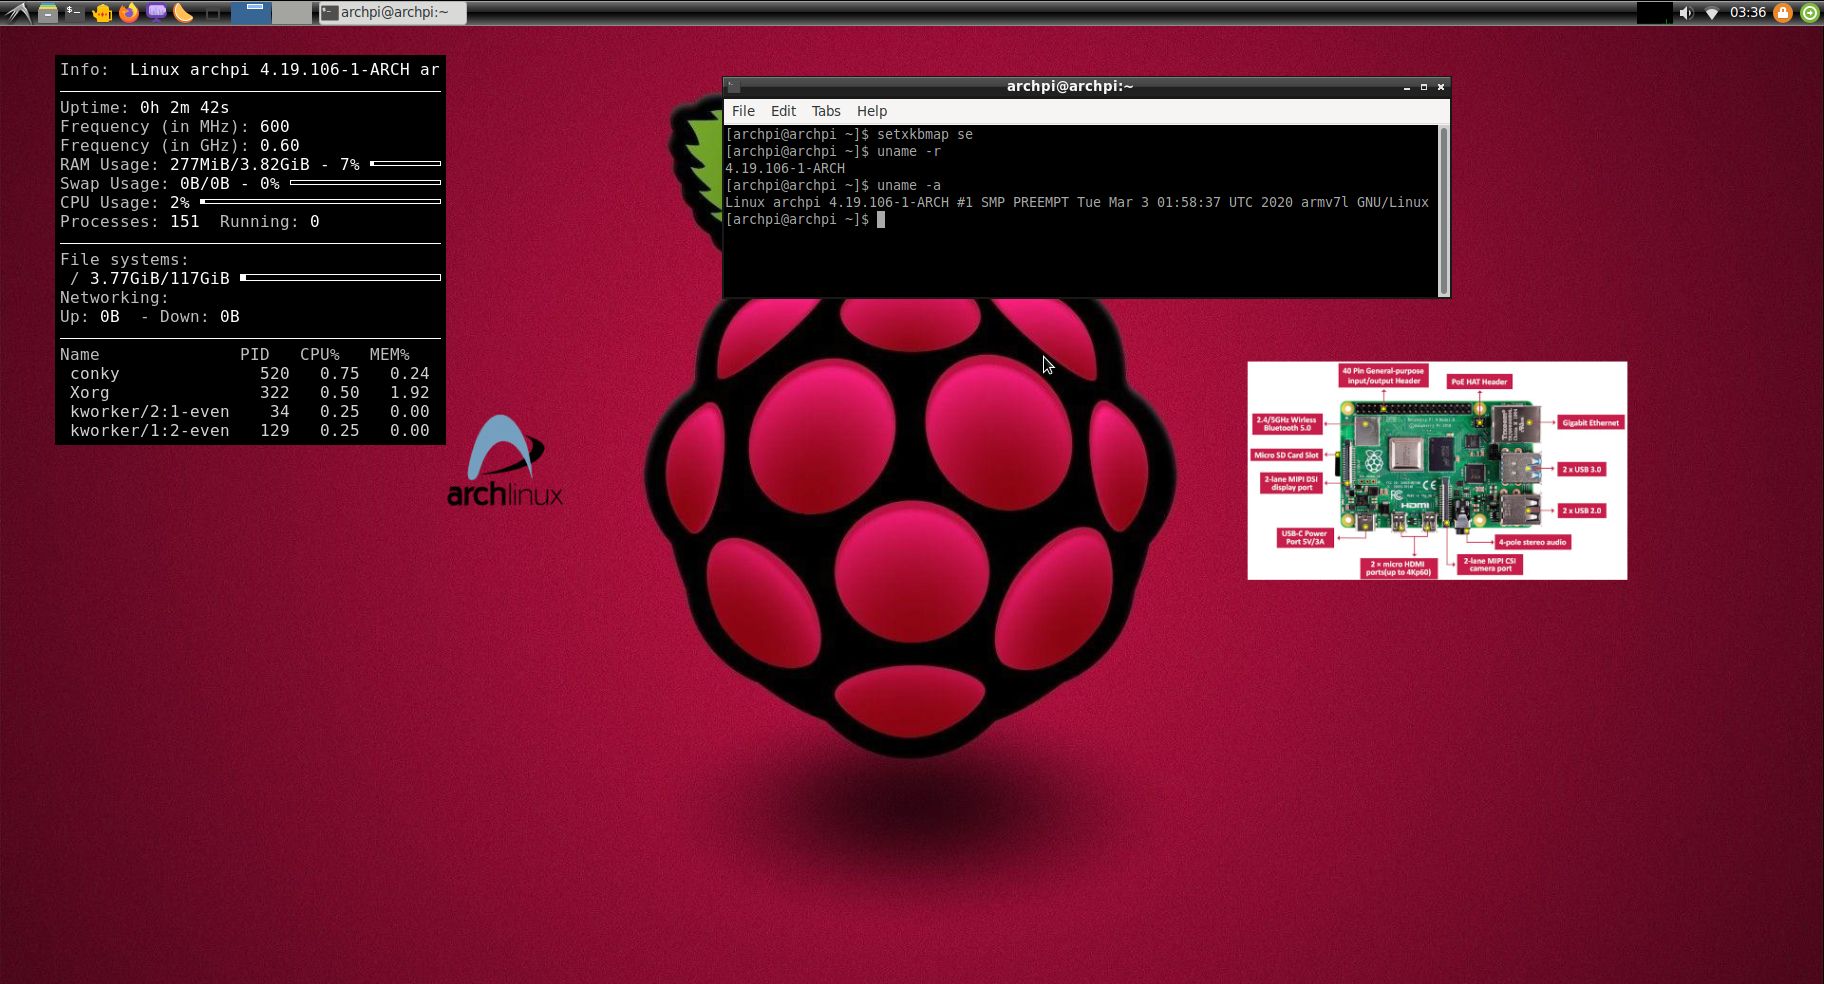
Screenshot 1 of RaspArch’s Desktop – logged in as archpi
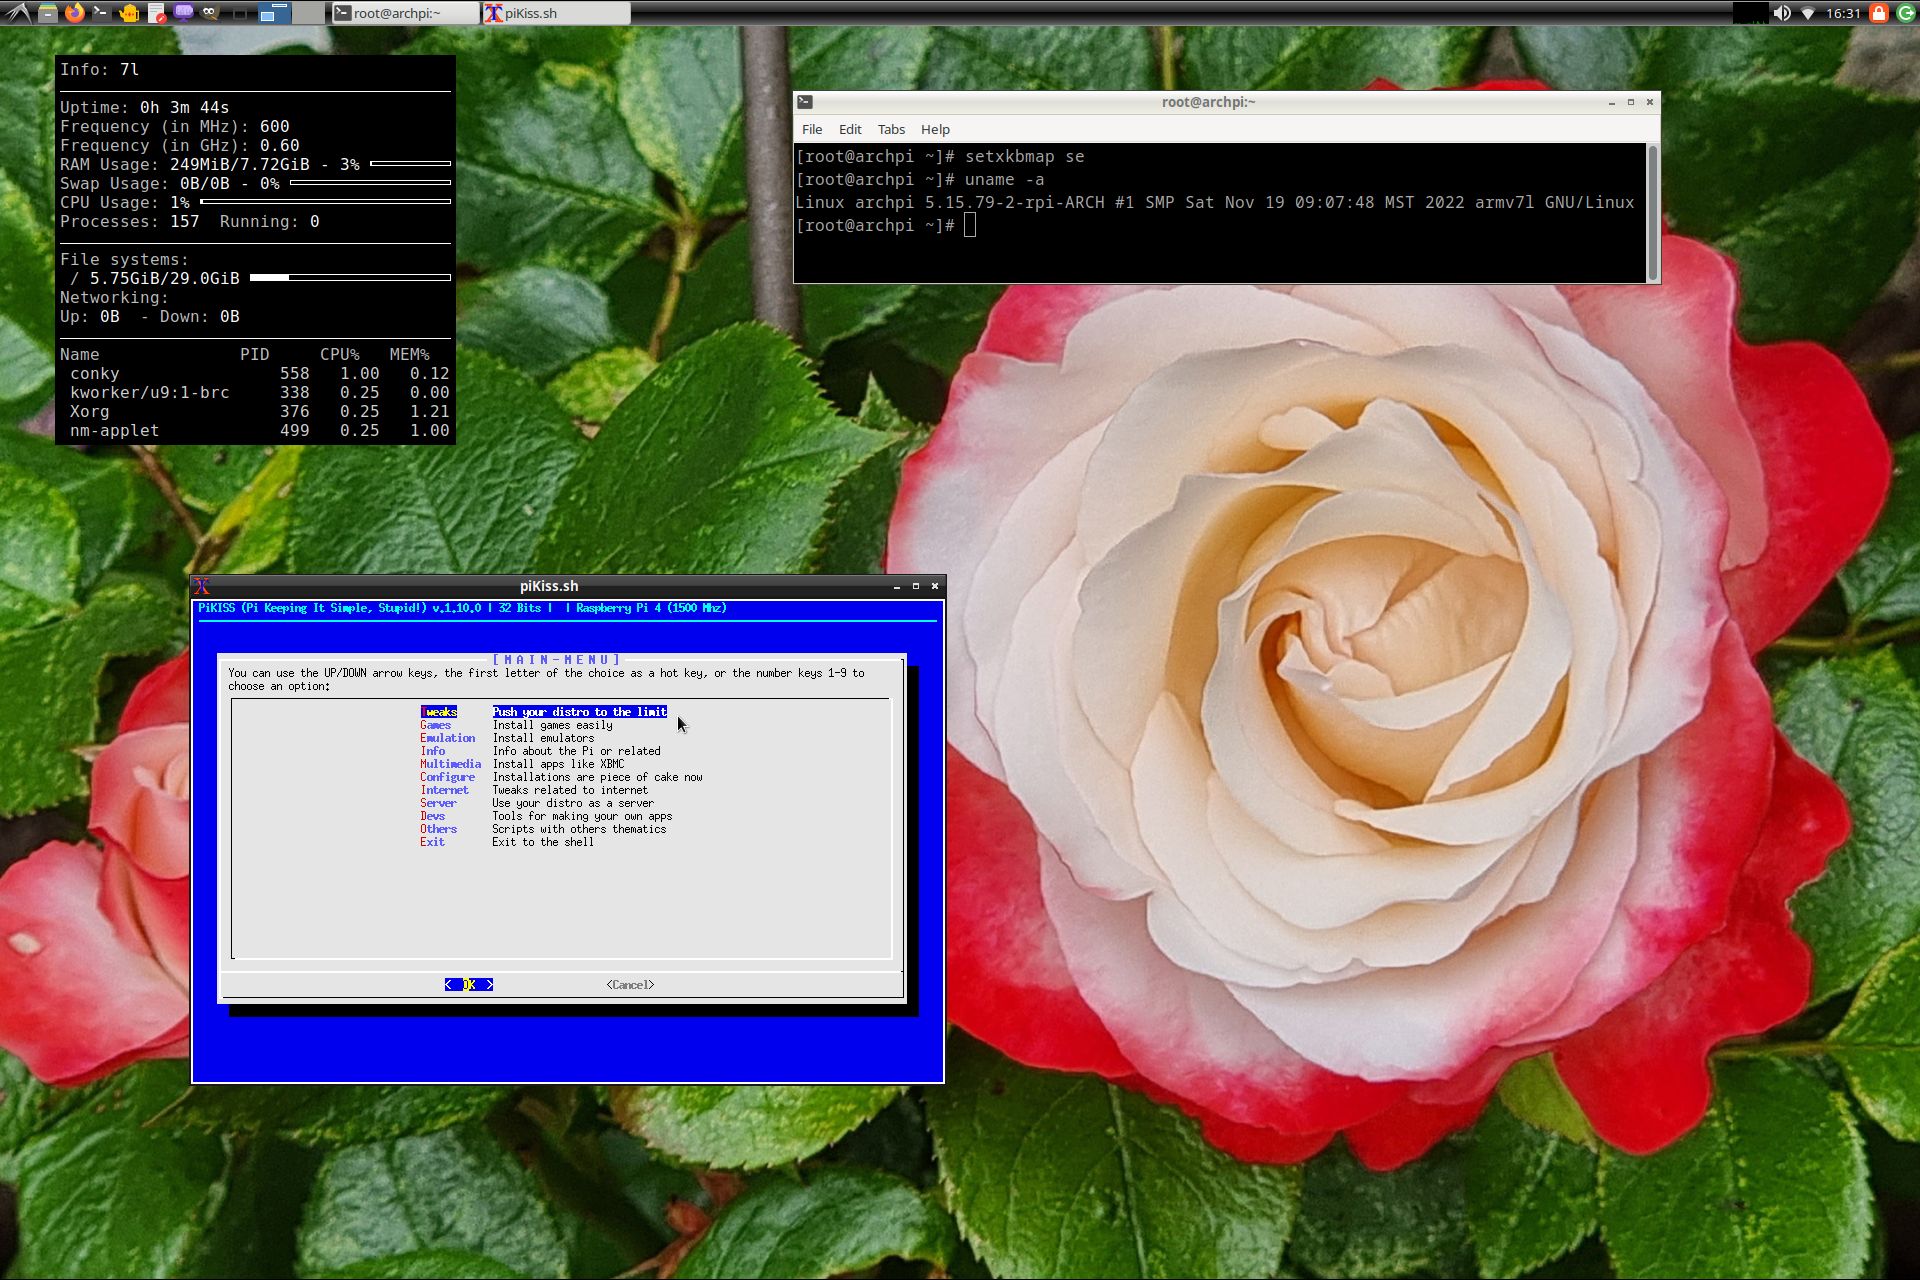
Screenshot 2 of RaspArch’s Desktop – logged in as root
Screenshot 3 – Using Yay (while installing SMPlayer)
Screenshot 4 – Samba connection to a Windows computer
Screenshot 5 – showing that you can watch 4K videos using Firefox
DOWNLOAD
This RaspArch version has been replaced by version 230908…
andex.exton.net – latest is AndEX 11 (with GAPPS), AndEX 10 (with GAPPS) and AndEX Pie 9.0 (also with GAPPS)!
and
about my Android 13, 12, 11, 10, Pie, Oreo, Nougat, Marshmallow and Lollipop versions for Raspberry Pi 4 and 3/2 at
raspex.exton.se – latest is RaspAnd 13 and 12 (without GAPPS), RaspAnd 11 (with GAPPS) and RaspAnd Oreo 8.1 (also with GAPPS)!
Hi
I thank you very much for your great work – the latest rasparch runs very smooth using hardly any RAM!
I found 2 slightly annoying things though:
1. the screen resolution was hard coded in /boot/config.txt – it should be commented out in order to allow the system to determine the resolution.
2. time synchronisation does not work and the system always starts with Saturday, November 26, 01:30 something, which prevents calling https sites – even duckduckgo search engine from loading – I am working on a resolution.
Other than that – you created an amazing system – thank you again!
mykey
Thanks mykey!
Looks like I have to upload a new version of RaspArch then. Please let me know your solution re. the time problem. I have not noticed the problem myself.
I did what you said to install and I get a message saying start4.elf needs to be updated so i update it and now I get a black screen iv retried several different monitors and touch screens same deal I can see the lights blinking on the pi like something is loading
What happen if you don’t update start4.elf?